To make the flowers you need some
gorgeous paper or card. I found thick paper
/thin card best. Creative Moments stock
some fab ones.
Things you need to make
the flowers.
the flowers.
The first thing to do is cut the dies out with the
cuttlebug, you can cut as many or as few as you like
depending on how big a flower you want.
I have used 5 on mine.
Next the edges around the sections need to be
inked with any colour you like. I chose a bold colour so it stands out and gives the petal depth.
Do this on all of your sections.
Now you need to fold each section
either side of the petal and in the centre.
With your scissors cut either side of the petal
do not cut right to the centre though
leave about 1 cm on the largest and adapt
for the smaller ones.
The largest should look like this
when cut.
Make a hole in the centre of
each section big enough for
your brad.
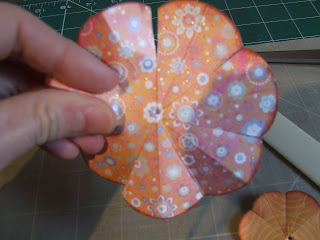
With your fingers and thumb you
need to bend the petal either side.
Then place you thumb in the centre
and push down and twist up with your
fingers to give it some lift.
Once you've done all your sections
they should look like this.
Now take all your sections and place them
one on top of the other. Starting large
at the bottom.
Ending with smallest at the top.
Tese can now be twisted which every
way you feel happy with them.
Then pop your brad in the centre.
Your finished flower
should look like this!!!!!
Hope you find this tutorial useful. Later on i will be putting different flowers made with different shaped Nestabilities if you fancy a peek.


